In previous asp.net server control post we had discussed about MultiView Control and DropDownList Control and ListBox Control and CheckBox Control and RadioButton Control and Adrotator Control and TextBox Control.
ASP.Net FileUpload Control
In this asp.net tutorial i will explain how to upload file or image from local drive to website using fileupload control.
The fileupload control in asp.net used to upload any file like image, document file, zip file ..etc to asp.net website.
Here, we understand how to upload file using fileupload control with an asp.net example.
first create a new asp.net empty website, add new web forms Default.aspx in asp.net website and drag and drop fileupload control from toolbox to default page.
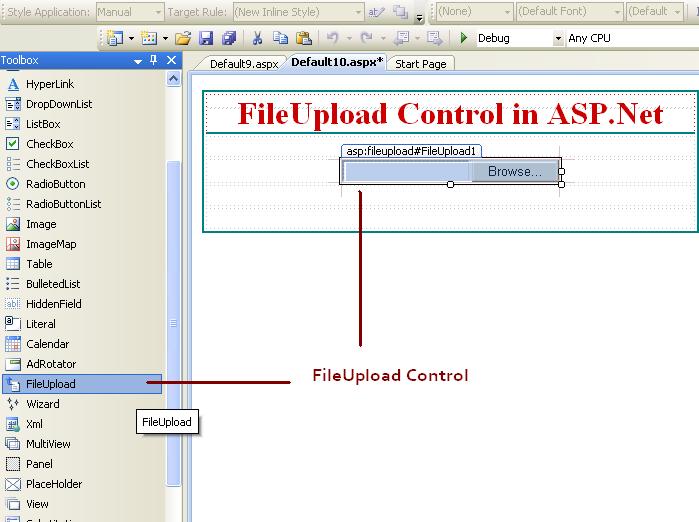
FileUpload Control Example in ASP.Net
Step 1 – Open the Visual Studio –> Create a new empty Web application.
Step 2 – Create a New web page for display FileUpload control.
Step 3 – Drag and drop FileUpload control on web page along with one Button control from Toolbox.
Step 4 – Write server side code in button click event for upload image using FileUpload control.
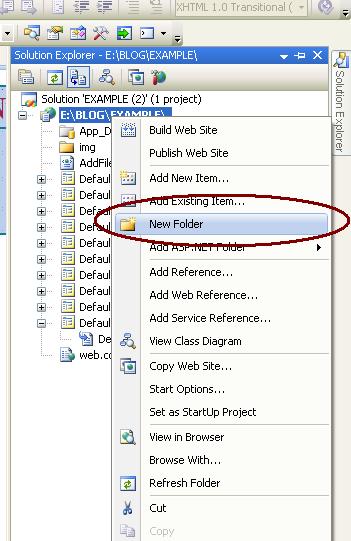
Step 5 – Create new folder “img” in solution explorer to store images.
ASP.Net FileUpload Control Example
Here is the html source code for above asp.net web page.
<body>
<form id="form1" runat="server">
<div>
<table align="center" class="style1" style="border: thin solid #008080">
<tr>
<td class="style2"
style="text-align: center; border-bottom-style: solid; border-bottom-width: thin; border-bottom-color: #008080;">
FileUpload Control in ASP.Net</td>
</tr>
<tr>
<td style="text-align: center">
</td>
</tr>
<tr>
<td style="text-align: center">
Select File :
<asp:FileUpload ID="FileUpload1" runat="server" />
</td>
</tr>
<tr>
<td style="text-align: center">
<asp:Button ID="btnupload" runat="server" onclick="btnupload_Click"
style="font-weight: 700" Text="Upload" />
</td>
</tr>
<tr>
<td style="text-align: center">
<asp:Label ID="Label1" runat="server" Font-Bold="True"></asp:Label>
</td>
</tr>
</table>
</div>
</form>
</body>Now, add new folder for save uploaded image by right click on website project and select New Folder shows like below. give name img to newly created folder in asp.net. when we upload file or image using fileupload control the file uploaded in to img folder in our website.
Here, is the asp.net fileupload control example design layout. here we took one fileupload control, a button control and a label control for design web page. fileupload control brows and select the image or file from our local drive fro upload and the button control upload the file to desired folder in out website. In this fileupload control example we make img folder for save file on website.

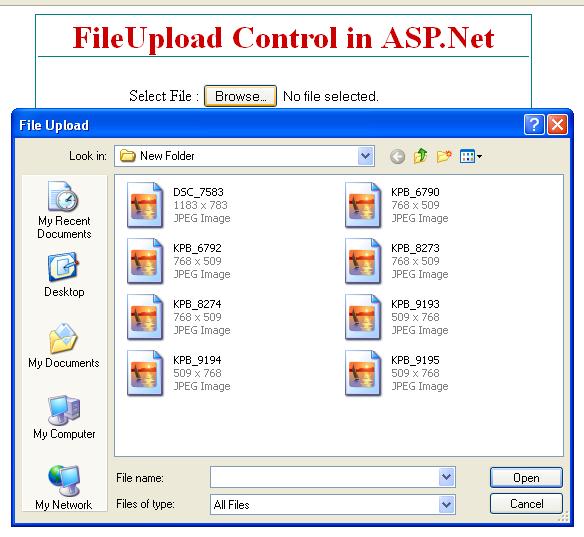
Here, we can see the output when we browse the file for upload. just select any file from local drive and select open button to select the file for upload.
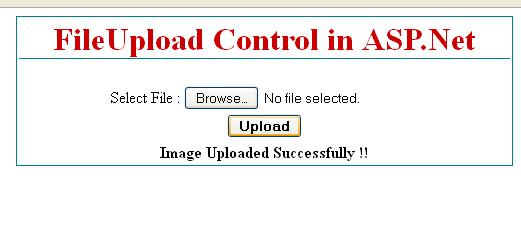
After selecting file for upload click the Upload button to upload file to desired location at website.
Here, is the button click event code for upload file to specific folder on website.
using System;
using System.Collections.Generic;
using System.Linq;
using System.Web;
using System.Web.UI;
using System.Web.UI.WebControls;

public partial class Default10 : System.Web.UI.Page
{
    protected void Page_Load(object sender, EventArgs e)
    {

    }
    protected void btnupload_Click(object sender, EventArgs e)
    {
        if (FileUpload1.HasFile)
        {
            FileUpload1.SaveAs(Server.MapPath("~/img/") + FileUpload1.FileName);
            Label1.Text = "Image Uploaded Successfully !!";
        }
        else
        {
            Label1.Text = "Select image first !!";
        }
    }
}
If you don’t select any file and click the upload button you will get error message like Select image first dhows in below asp.net screen.

FileUpload Control Example
Let’s take an another fileupload control example to understand more about fileupload control in asp.net.
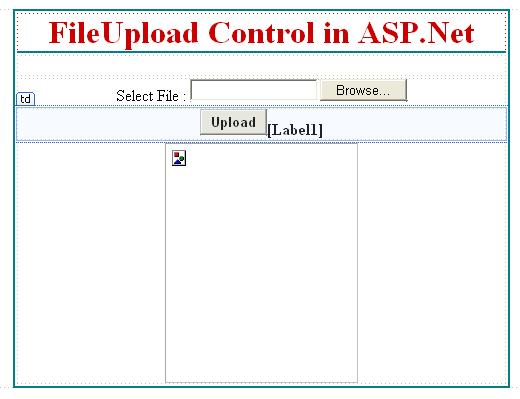
Here, we design an asp.net web forms with fileupload control, a button and image control for displaying image.
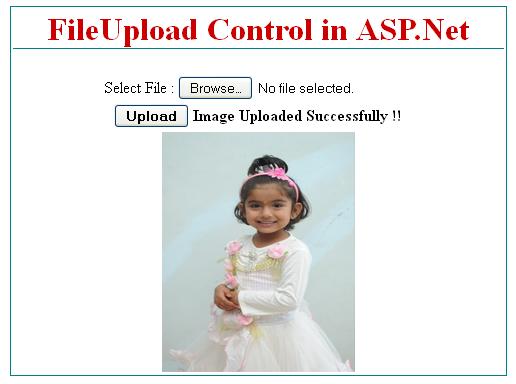
In this example we upload the image file using fileupload control and displaying that image on image control at same time of uploading image on asp.net web application.
Design webform with fileupload control, button control along with image control like below screen.
Here is the upload button c# code:
protected void btnupload_Click(object sender, EventArgs e)
    {
        if (FileUpload1.HasFile)
        {
            FileUpload1.SaveAs(Server.MapPath("~/img/") + FileUpload1.FileName);
            Image1.ImageUrl = "~/img/" + FileUpload1.FileName;
            Label1.Text = "Image Uploaded Successfully !!";
        }
        else
        {
            Label1.Text = "Select image first !!";
        }
    }
Related ASP.Net Topics :
AdRotator Control in ASP.Net
ListBox control in ASP.Net C#
Subscribe us
If you liked this asp.net post, then please subscribe to our YouTube Channel for more asp.net video tutorials.
We hope that this asp.net tutorial helped you to understand about FileUpload control.
Next, asp.net tutorial we will understand about HyperLink Control.
What about image rotation for web pages?
use Adrotator control.