ASP.Net – SQL Server Database Connectivity using SqlDataAdapter method.
In this ASP.Net tutorials we are going to learn how make connection between ASP.Net and SQL-Server using SqlDataAdapter method.
If we want to make dynamic web application, then we must have to use database and we need to make connection between our application and database server.There are many database server available in market, in this asp.net example we will learn SQL Server connectivity with our asp.net web application.
There are many methods or we can say many way we can make connection between asp.net application and sql server database.
There are many method to make connection between ASP.Net and SQL-Server database.
The main method are connection using SqlDataAdapter, asp.net – sql connection using SqlCommand, asp.net – sql connection using Table Adapter method, asp.net – sql connection using LINQ method.
ASP.Net – SQL Server Database Connectivity Video Tutorial.
Here, In this asp.net connectivity example we will learn asp.net with sql server connection using SqlDataAdapter method. In this asp.net connectivity example we will use Visual Studio 2010 and SQL Server Management Studio 2008.
The step for connectivity between ASP.Net and SQL Server Database.
Step 1 – Open Visual Studio 2010 Create web application
Step 2 – Add new web form and design web form
Step 3 – Open SQL Server Management Studio 2008 Create new database
Step 4 – Create new Table in Database
Step 5 – For connection add two namespace – using system.data.sqlclient; using system.data;
Step 6 – Declare SqlConnection object for connectivity
Step 7 – Declare SqlDataAdapter object for write sql query
Step 8 – Declare DataTable object for store data from database.
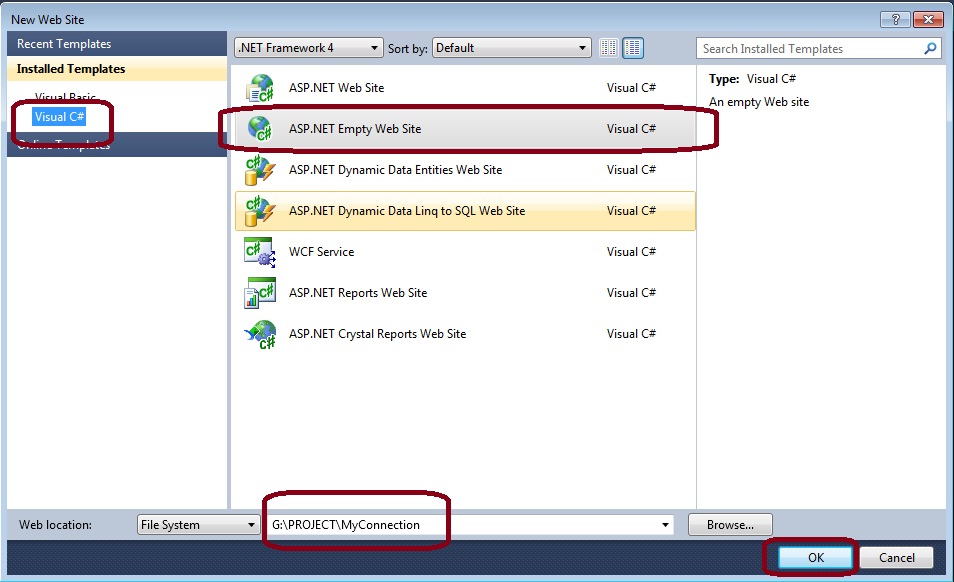
STEP 1 – Open Visual Studio 2010 Create empty web application.
Step 2 – Add new web form and design web form for asp.net example.
below the html design source code for asp.net example.
<table align="center" class="style11">
<tr>
<td class="style12">
</td>
<td>
</td>
</tr>
<tr>
<td class="style12">
Name :</td>
<td>
<asp:TextBox ID="txtname" runat="server"></asp:TextBox>
</td>
</tr>
<tr>
<td class="style12">
City :</td>
<td>
<asp:TextBox ID="txtcity" runat="server"></asp:TextBox>
</td>
</tr>
<tr>
<td class="style12">
Email :</td>
<td>
<asp:TextBox ID="txtemail" runat="server"></asp:TextBox>
</td>
</tr>
<tr>
<td class="style13">
</td>
<td>
<asp:Button ID="Button1" runat="server" Text="SAVE" onclick="Button1_Click"
style="font-weight: 700" />
</td>
</tr>
<tr>
<td class="style13">
</td>
<td>
</td>
</tr>
<tr>
<td class="style13">
</td>
<td>
<asp:GridView ID="GridView1" runat="server" BackColor="White"
BorderColor="#CCCCCC" BorderStyle="None" BorderWidth="1px" CellPadding="3"
style="text-align: center" Width="284px">
<FooterStyle BackColor="White" ForeColor="#000066" />
<HeaderStyle BackColor="#006699" Font-Bold="True" ForeColor="White" />
<PagerStyle BackColor="White" ForeColor="#000066" HorizontalAlign="Left" />
<RowStyle ForeColor="#000066" />
<SelectedRowStyle BackColor="#669999" Font-Bold="True" ForeColor="White" />
<SortedAscendingCellStyle BackColor="#F1F1F1" />
<SortedAscendingHeaderStyle BackColor="#007DBB" />
<SortedDescendingCellStyle BackColor="#CAC9C9" />
<SortedDescendingHeaderStyle BackColor="#00547E" />
</asp:GridView>
</td>
</tr>
</table>
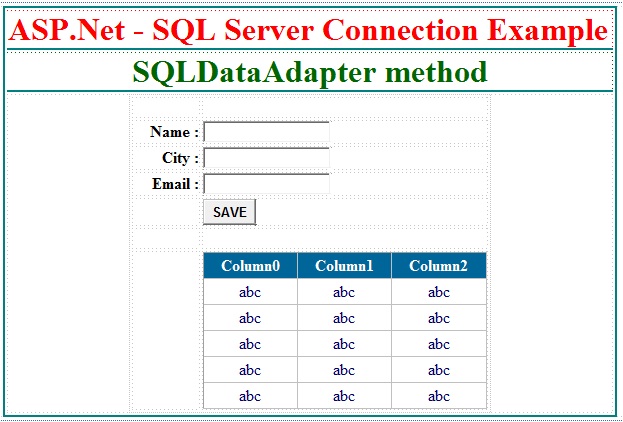
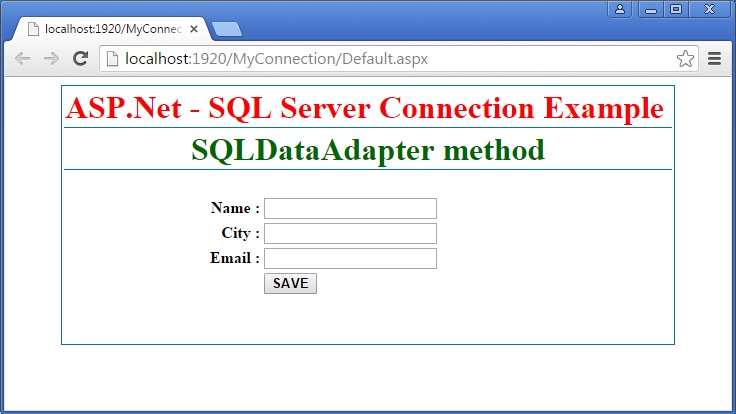
The ASP.Net – SQL Server Connection Example output of design layout is :
Now after designing asp.net web form, create database in sql server management studio 2008.
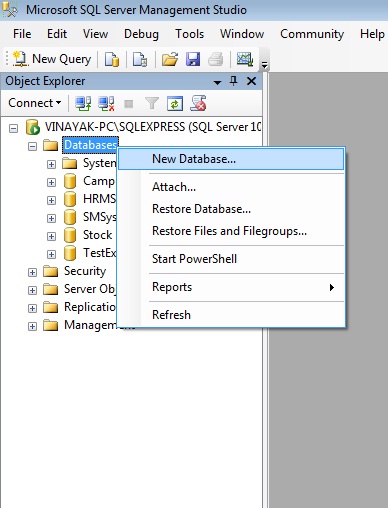
Step 3 – Open SQL Server Management Studio 2008 Create new database
Step 4 – Create new Table in Database
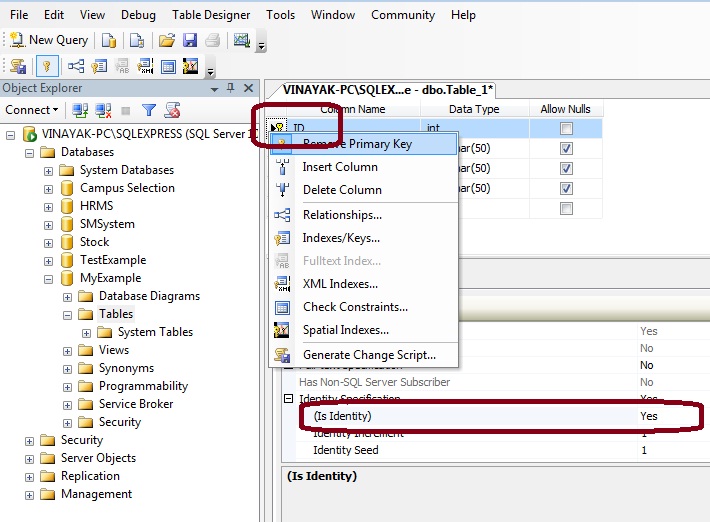
Here, we have created database “MyExample”. Now create new table with some columns in “MyExample” database. In out previous sql post we have already learned to create new database and create new table in sql server management studio 2008.
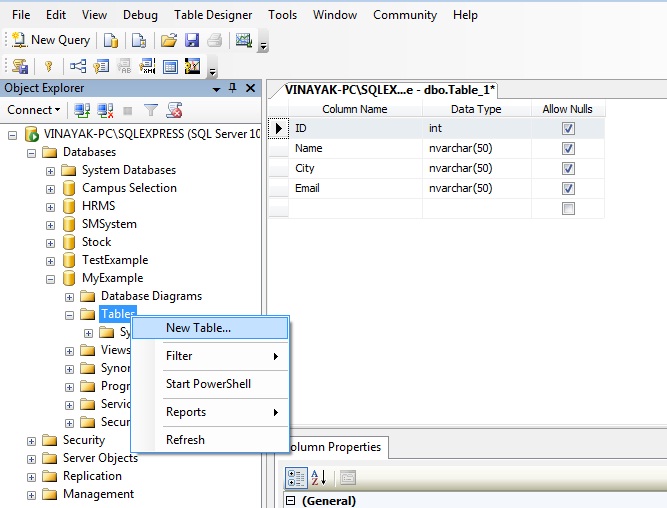
Here, in asp.net example we have created table “UserMst” with four columns ID, Name, City and Email. The ID column of UserMst table is a primary key and auto increment column and the rest of three are nvarchar() datatype columns.
Now, up to this we have finished design we application and create database and table. The asp.net web application and sql server database are ready to connect each other. now we have to make some programming to connect sql server with asp.net web application.
Step 5 – Add namespace
In asp.net example for SqlConnection, SqlDataAdpater and DataTable object we need to add two namespace in c# coding page.
using System.Data.SqlClient;
using System.Data;
Step 6 – Declare SqlConnection object for connectivity
SqlConnection – SqlConnection object is used to handles database connection with asp.net and sql server. SqlConnection initiates a connection to our sql server database.
We have to declare SqlConnection object with sql connection string like below.
SqlConnection SQlConn = new SqlConnection(“Data Source=SqlServer_Name; Initial Catalog=Database_Name; Integrated Security=true”);
SqlConnection SQlConn = new SqlConnection(“Data Source=.\\SQLExpress; Initial Catalog=MyExample; Integrated Security=true”);
Step 7 – Declare SqlDataAdapter object for write sql query
SqlDataAdapter – SqlDataAdapter is a bright between Database and DataSet or DataTable. SqlDataAdapter is handles the operation like insert, update data to database and retrieve, delete data from database.
Here, we can write select sql statement in SqlDataAdapter for select data from UserMst table.
SqlDataAdapter SQLAdapterr = new SqlDataAdapter(“Select * from UserMst”, SQlConn);
Step 8 – Declare DataTable object for store data from DataAdapter.
DataTable DT = new DataTable();
SQLAdapter.Fill(DT);
Now, lets understand insert data to database and select data from database with an asp.net example. Here we have design asp.net web form with three textbox for Name, City and Email and one Button control for insert data in to database then retrieve data and display data in to gridview control in below example.
– Write below code on Button Click Event:
protected void Button1_Click(object sender, EventArgs e)
{
SqlConnection SQlConn = new SqlConnection(“Data Source=.\\SQLExpress; Initial Catalog=MyExample; Integrated Security=true”);
SqlDataAdapter SQLAdapter = new SqlDataAdapter(“insert into UserMst values(‘”+txtname.Text+”‘,'”+txtcity.Text+”‘,'”+txtemail.Text+”‘)”, SQlConn);
DataTable DT = new DataTable();
SQLAdapter.Fill(DT);SqlDataAdapter SQLAdapterr = new SqlDataAdapter(“Select * from UserMst”, SQlConn);
SQLAdapterr.Fill(DT);
GridView1.DataSource = DT;
GridView1.DataBind();}
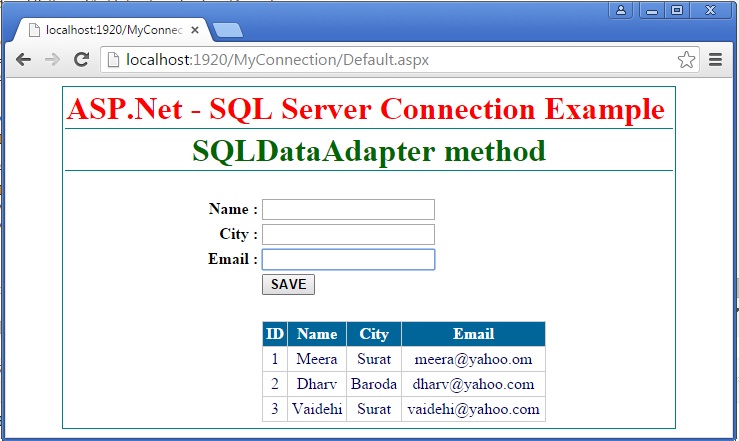
The ASP.Net connectivity example output is :
I hope this asp.net sql server connection example will help you……
