In this ASP.Net tutorials we are going to learn How Make connection between ASP.Net and SQL-Server using SQLCommand.
There are many method to make connection between ASP.Net and SQL-Server.
1.Connection using TableAdapter and StoredProcedure thought Wizards.
2. Connection using SQLCommand and SQLDataAdapter using StoredProcedure .
3. Connection using SQLDataAdapter and SQLConnection writing query in webpage.
STEP 1 – Create new website in ASP.Net. Write below code for Design Webpage:
<table>
<tr>
<td>
</td>
<td>
<asp:Button ID=”btnsave” runat=”server” Font-Bold=”True”
onclick=”btnsave_Click” Text=”GET DATA” />
</td>
</tr>
<tr>
<td>
</td>
<td>
</td>
</tr>
<tr>
<td>
</td>
<td>
<asp:GridView ID=”GridView1″ runat=”server”>
</asp:GridView>
</td>
</tr>
</table>
– The ASP.Net Design Output is:

STEP 2 – Now Open the SQL-Server and Create a New DataBase.
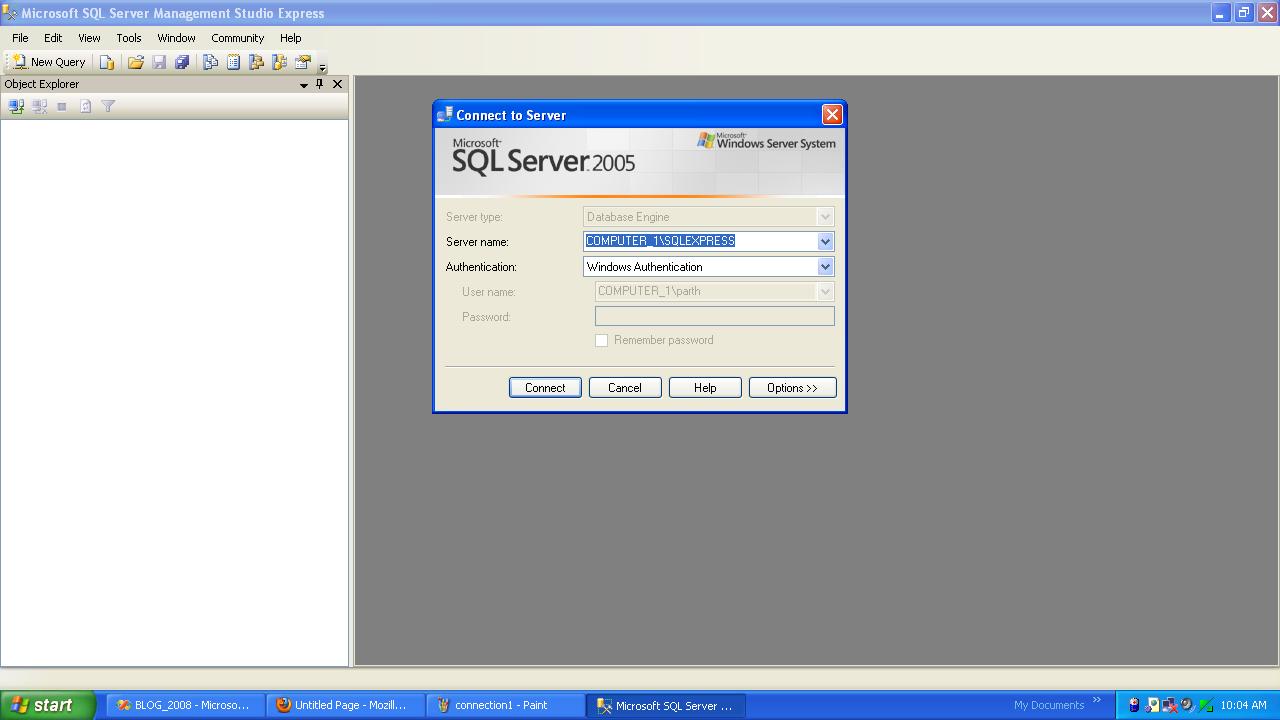
– Now Open the SQL-Server and Create New Database like below:
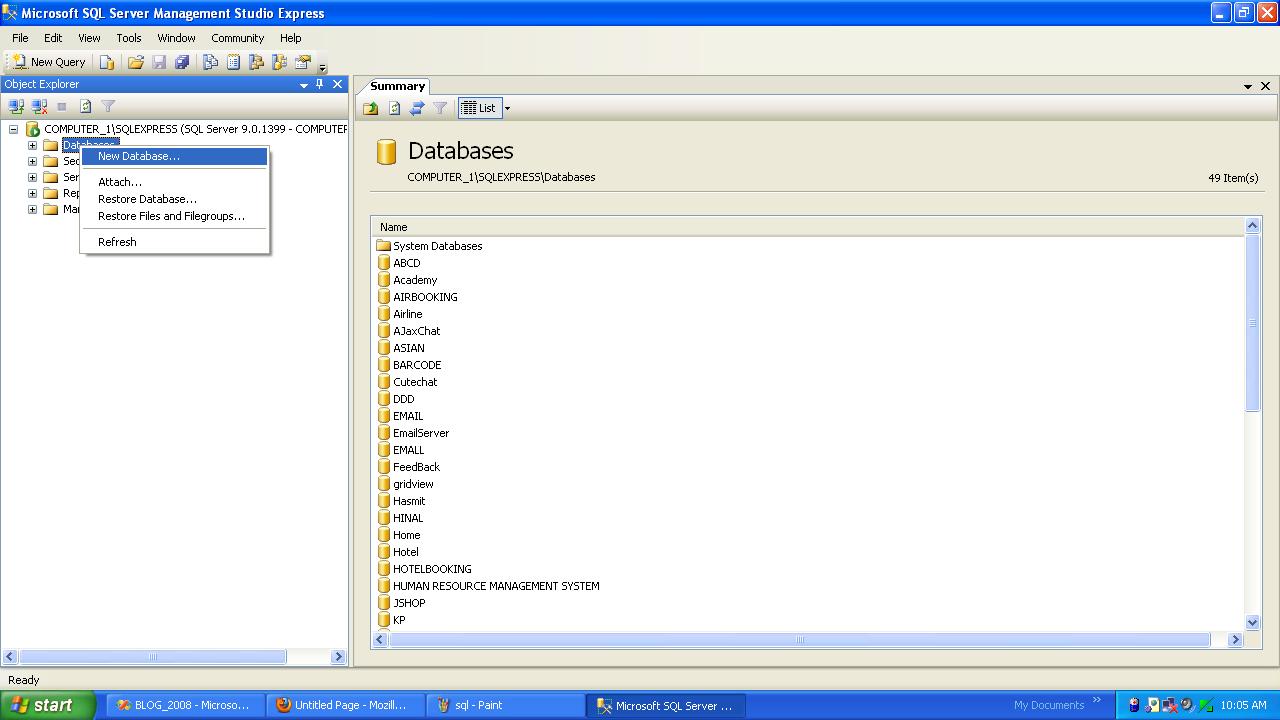
– Now, After Creating a New Database create a New Table like Below:
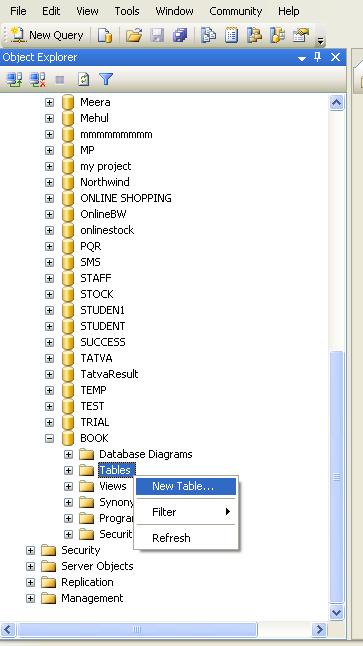
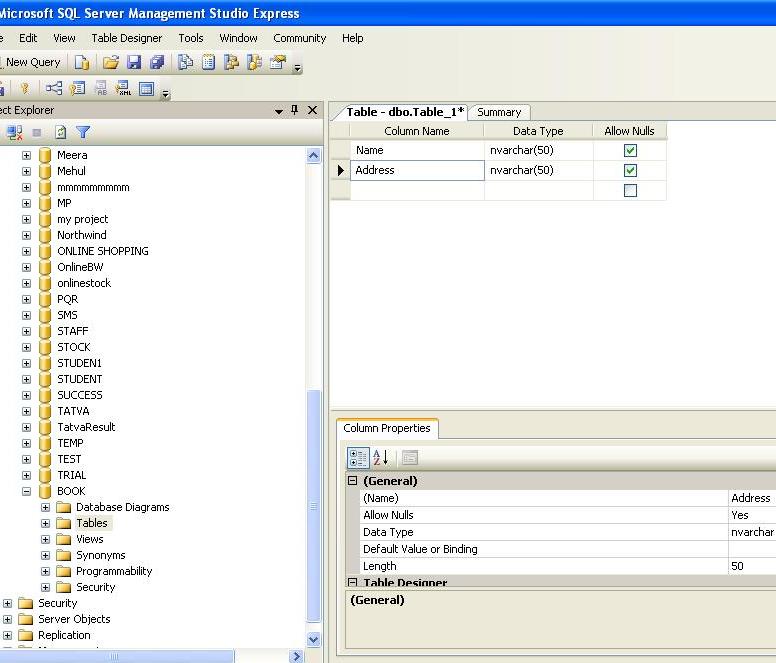
– Now create a New StoredProcedure in SQL-SERVER like below:
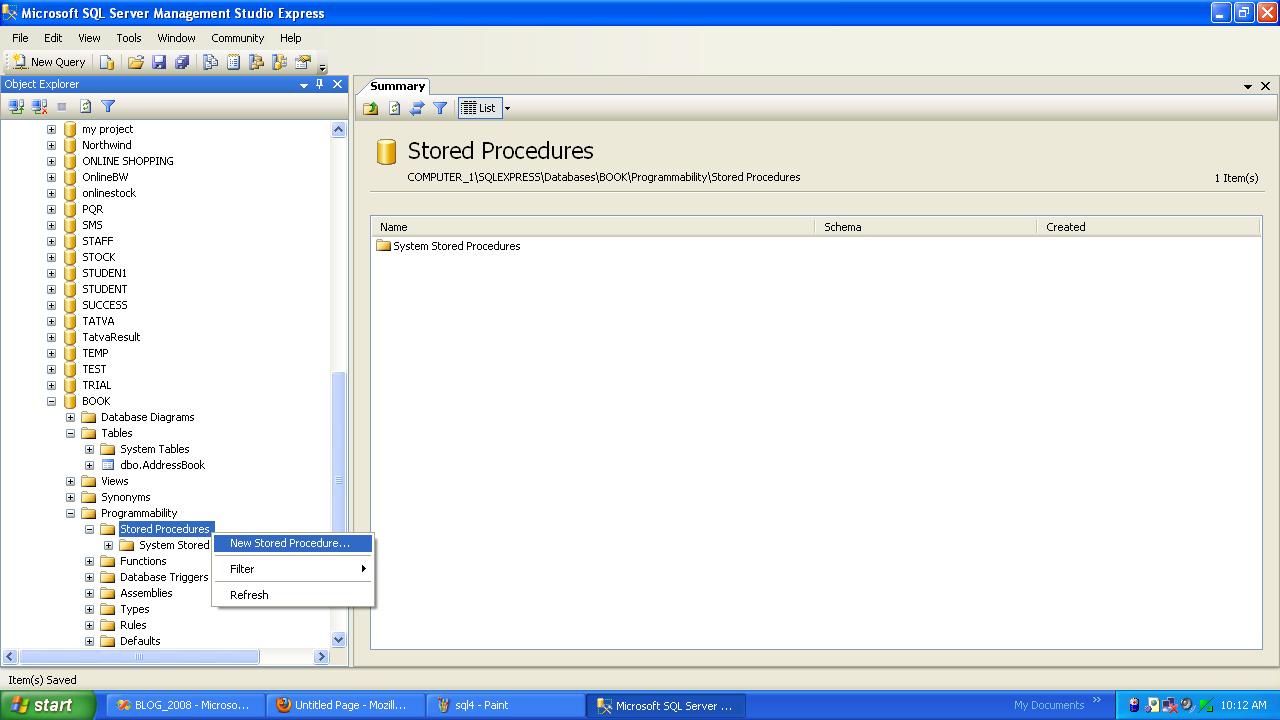
– Create a Stored Procedure for SELECT:
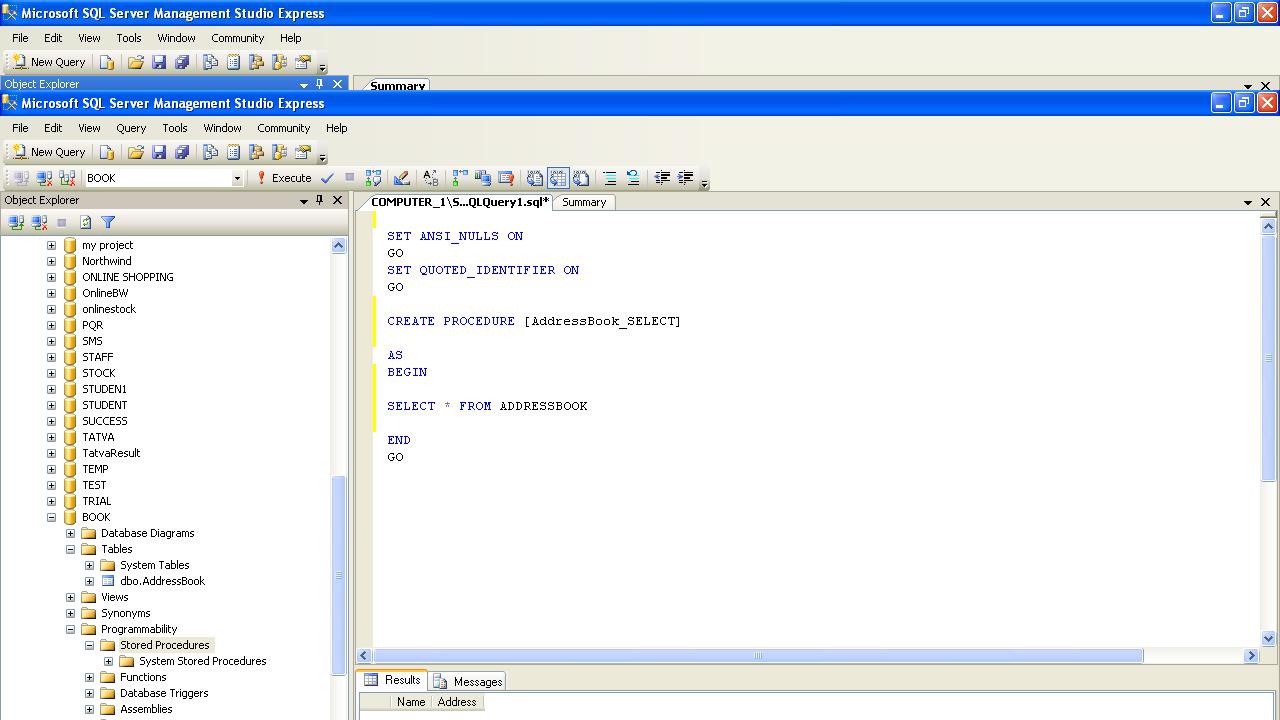
STEP 3 -After doing this things write below code for connectivity.
Import below namespace first:
using System.Data.Sql;
using System.Data.SqlClient;
– Write below asp.net code on button click event for connectivity:
string strconn = “Data Source=.\\SQLEXPRESS;Initial Catalog=’BOOK’;Integrated Security=True”;
SqlConnection sqlconn = new SqlConnection(strconn);
SqlCommand sqlcmd = new SqlCommand(“AddressBook_SELECT”, sqlconn);SqlDataAdapter adapter = new SqlDataAdapter(sqlcmd);
DataTable DT = new DataTable();
adapter.Fill(DT);GridView1.DataSource = DT;
GridView1.DataBind();
– The ASP.Net Connection Output like:
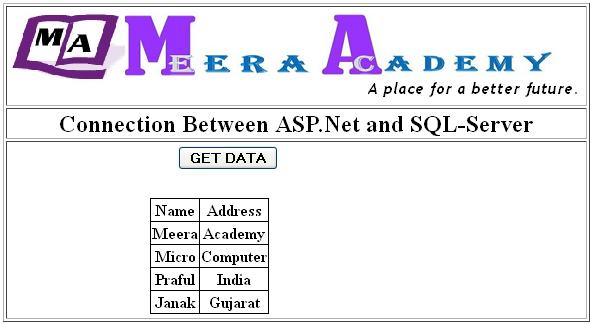
– I hope you will enjoy this ASP.Net tutorial for Connectivity.