– Here we are going to learn how to bind Data in Gridview control from SQL-Server Databse in ASP.Net with C#.
– GridView control is most important control in ASP.Net.
– GridView control used to Bind Data from Database and Display Data on webform.
STEP 1 – get the Gridview control on webform

<body>
<form id=”form1″ runat=”server”>
<div>
<table id=”TABLE1″ language=”javascript” onclick=”return TABLE1_onclick()” style=”z-index: 100;
left: 320px; position: absolute; top: 16px”>
<tr>
<td style=”width: 100px”>
</td>
<td style=”width: 100px”>
</td>
<td style=”width: 100px”>
</td>
<td style=”width: 100px”>
</td>
</tr>
<tr>
<td style=”width: 100px”>
NAME:</td>
<td style=”width: 100px”>
<asp:TextBox ID=”txtname” runat=”server”></asp:TextBox></td>
<td style=”width: 100px”>
</td>
<td style=”width: 100px”>
</td>
</tr>
<tr>
<td style=”width: 100px”>
SURNAME:</td>
<td style=”width: 100px”>
<asp:TextBox ID=”txtsurname” runat=”server”></asp:TextBox></td>
<td style=”width: 100px”>
</td>
<td style=”width: 100px”>
</td>
</tr>
<tr>
<td style=”width: 100px”>
ADDRESS:</td>
<td style=”width: 100px”>
<asp:TextBox ID=”txtaddress” runat=”server”></asp:TextBox></td>
<td style=”width: 100px”>
</td>
<td style=”width: 100px”>
</td>
</tr>
<tr>
<td style=”width: 100px”>
CITY:</td>
<td style=”width: 100px”>
<asp:TextBox ID=”txtcity” runat=”server”></asp:TextBox></td>
<td style=”width: 100px”>
</td>
<td style=”width: 100px”>
</td>
</tr>
<tr>
<td style=”width: 100px; height: 26px”>
PIN:</td>
<td style=”width: 100px; height: 26px”>
<asp:TextBox ID=”txtpin” runat=”server”></asp:TextBox></td>
<td style=”width: 100px; height: 26px”>
</td>
<td style=”width: 100px; height: 26px”>
</td>
</tr>
<tr>
<td style=”width: 100px”>
USERNAME:</td>
<td style=”width: 100px”>
<asp:TextBox ID=”txtusername” runat=”server”></asp:TextBox></td>
<td style=”width: 100px”>
</td>
<td style=”width: 100px”>
</td>
</tr>
<tr>
<td style=”width: 100px”>
PASSWORD:</td>
<td style=”width: 100px”>
<asp:TextBox ID=”txtpassword” runat=”server” TextMode=”Password” Width=”152px”></asp:TextBox></td>
<td style=”width: 100px”>
</td>
<td style=”width: 100px”>
</td>
</tr>
<tr>
<td style=”width: 100px; height: 34px”>
</td>
<td style=”width: 100px; height: 34px”>
<asp:Button ID=”BTNSUBMIT” runat=”server” Font-Bold=”True” Height=”40px” OnClick=”BTNSUBMIT_Click”
Text=”SUBMIT” Width=”96px” /></td>
<td style=”width: 100px; height: 34px”>
</td>
<td style=”width: 100px; height: 34px”>
</td>
</tr>
<tr>
<td colspan=”4″ style=”height: 26px”>
<asp:GridView ID=”GridView1″ runat=”server” CellPadding=”4″ DataKeyNames=”id”
ForeColor=”#333333″ GridLines=”None”>
<RowStyle BackColor=”#F7F6F3″ ForeColor=”#333333″ />
<FooterStyle BackColor=”#5D7B9D” Font-Bold=”True” ForeColor=”White” />
<PagerStyle BackColor=”#284775″ ForeColor=”White” HorizontalAlign=”Center” />
<SelectedRowStyle BackColor=”#E2DED6″ Font-Bold=”True” ForeColor=”#333333″ />
<HeaderStyle BackColor=”#5D7B9D” Font-Bold=”True” ForeColor=”White” />
<EditRowStyle BackColor=”#999999″ />
<AlternatingRowStyle BackColor=”White” ForeColor=”#284775″ />
</asp:GridView>
</td>
</tr>
<tr>
<td colspan=”3″>
</td>
<td colspan=”1″>
</td>
</tr>
</table></div>
</form>
</body>
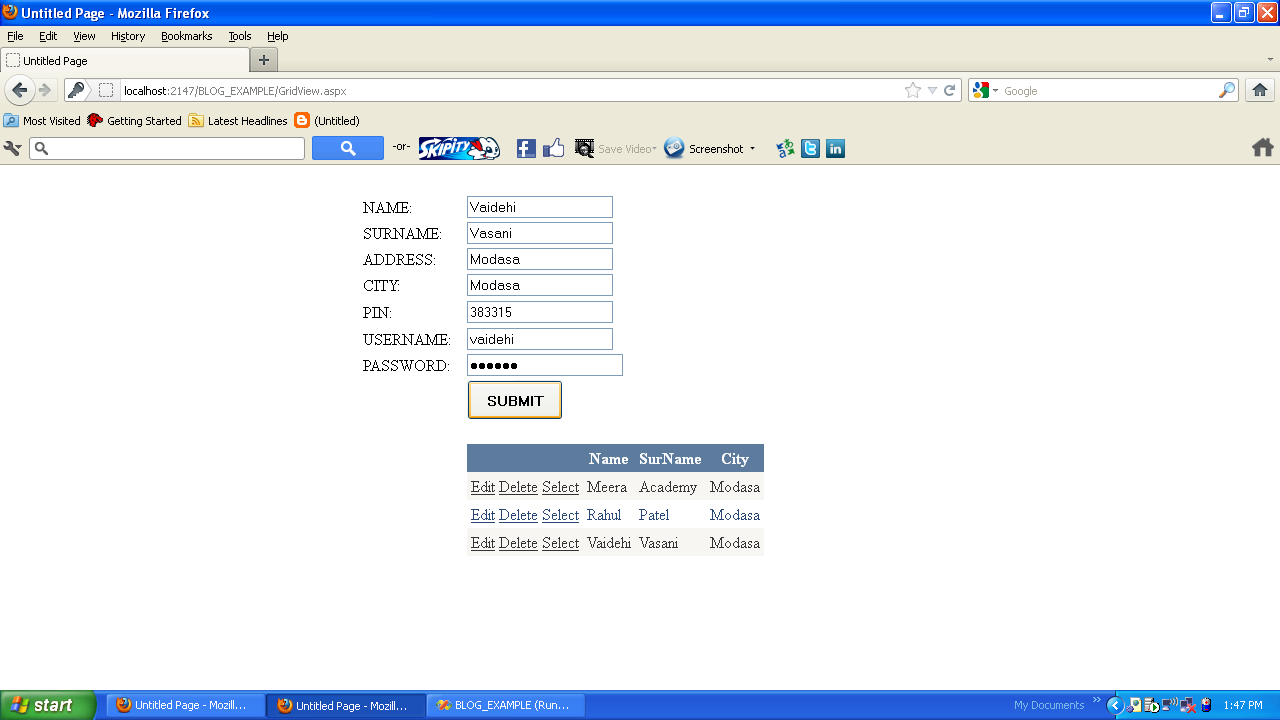
STEP 2 – make connection with SQL Server Database and Design Page as above.
– Write below code in Submit Button control Click_Event
protected void BTNSUBMIT_Click(object sender, EventArgs e)
{
DS_Grid.USERMST_SELECTDataTable GridDt = new DS_Grid.USERMST_SELECTDataTable();
DS_GridTableAdapters.USERMST_SELECTTableAdapter GridAdapter = new DS_GridTableAdapters.USERMST_SELECTTableAdapter();int insetdata = GridAdapter.Insert(txtname.Text, txtsurname.Text, txtaddress.Text, txtcity.Text, Convert.ToInt32(txtpin.Text), txtusername.Text, txtpassword.Text);
GridDt = GridAdapter.SelectUser();
GridView1.DataSource = GridDt;
GridView1.DataBind();
}OutPut :-